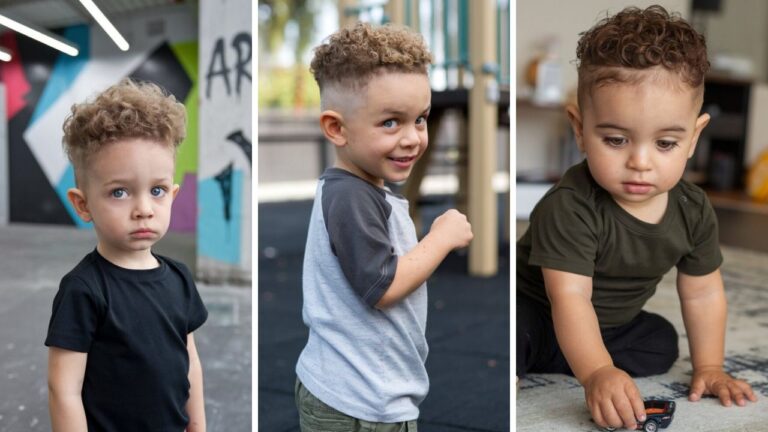
How to Cut Toddler Boy Hair at Home for Beginners
A Simple Step-by-Step Guide from a First-Time Parent
Cutting my toddler’s hair at home was one of those “this could go either way” parenting moments. I had no professional training—just a restless little one with growing bangs, and a few basic tools. But with a bit of patience, a distraction (hello, yogurt pouch!), and a comfy highchair, it turned out to be a surprisingly fun and rewarding experience.
In this post, I’ll walk you through how I gave my toddler son a clean, cute haircut at home—without tears (from either of us!). Whether it’s your first time or you’re looking for a better routine, I hope this helps.
What You’ll Need
Before you start snipping, gather the essentials. Here’s what worked for me:
- Sharp haircutting scissors – Not kitchen scissors. Actual hair shears make all the difference.
- Fine-tooth comb – Helps separate and guide hair evenly.
- Hair clips or ties (optional) – Useful for sectioning if your toddler has longer hair.
- Spray bottle with water – To lightly dampen hair. Makes cutting easier and more precise.
- Highchair or booster seat – Keeps your little one secure and at a good height.
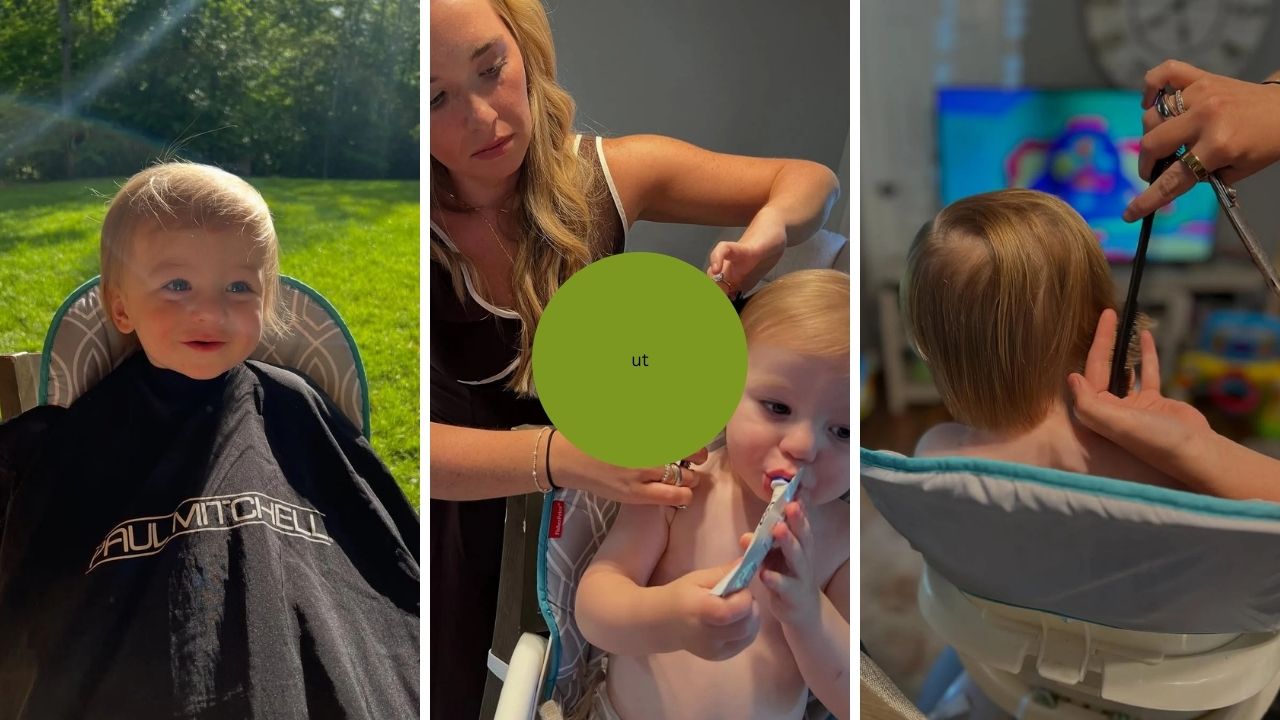
- Towel or haircutting cape – I used a Paul Mitchell cape we already had.
- Snacks or distractions – I gave him a yogurt pouch and had cartoons playing in the background.
- Good lighting – Natural light is ideal, especially for seeing details.
Step-by-Step: Cutting Toddler Hair at Home
Step 1: Set the Scene
We started outside in the early morning light. I dressed him in a cape and set him up comfortably in a chair with a headrest. He was calm, the sunlight made everything feel more relaxed, and I could clearly see the hair sections thanks to the natural brightness.
Tip: Choose a time when your toddler is well-rested and not hungry. Mornings are usually best.
Step 2: Calm Distraction is Key
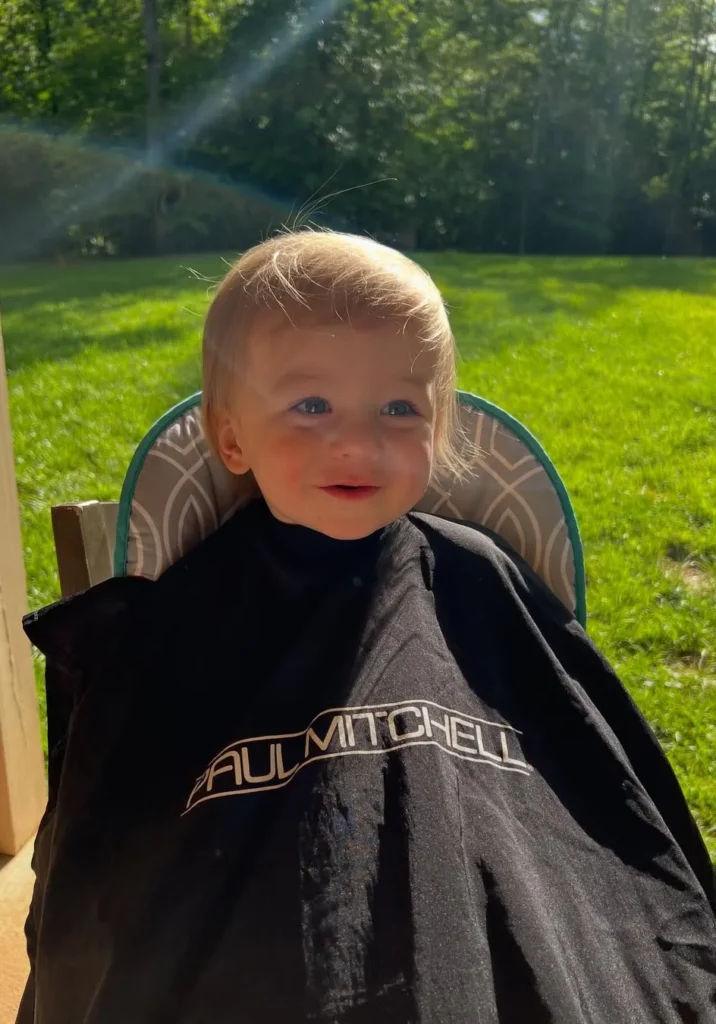
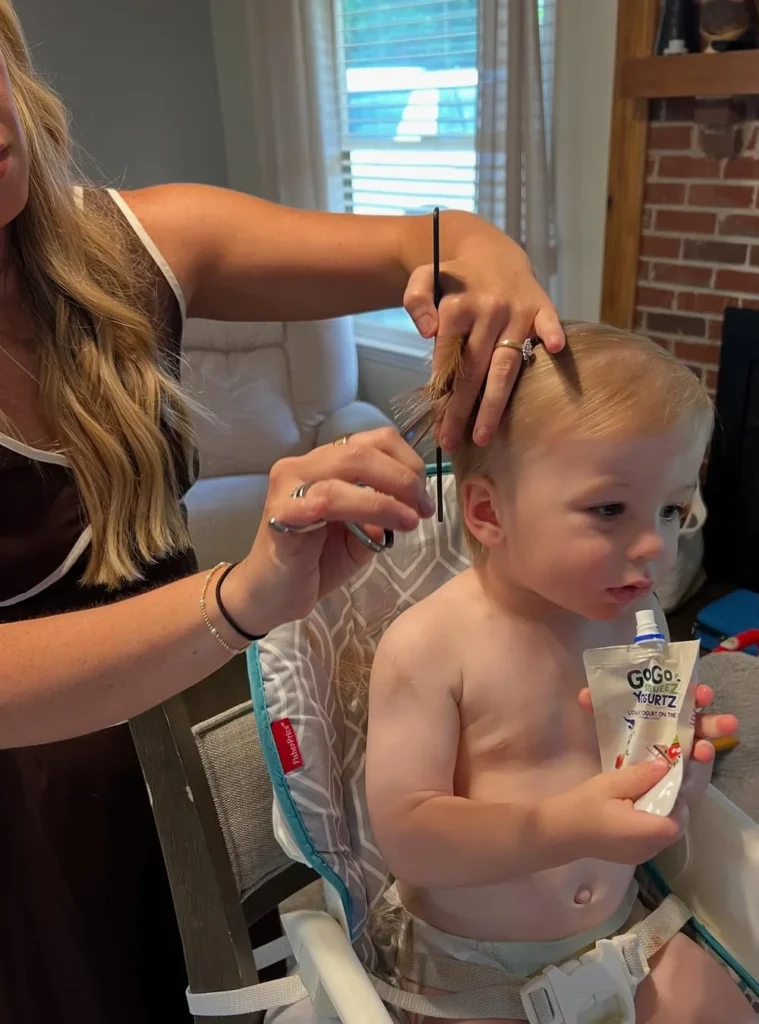
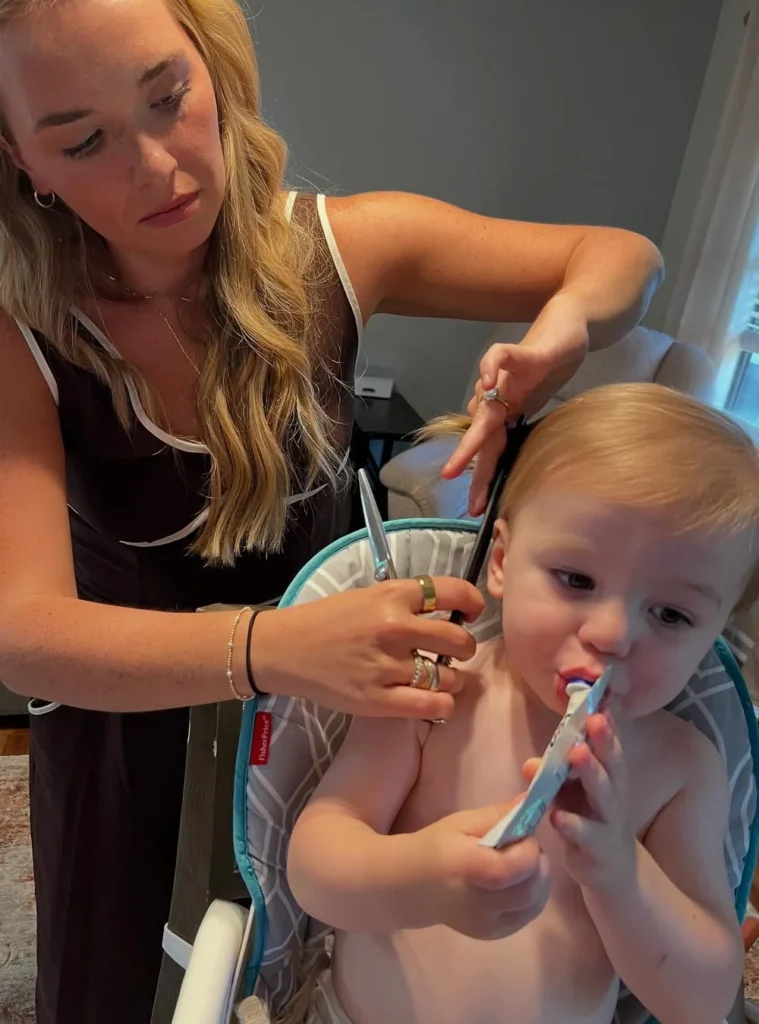
As I prepped my scissors and comb, I handed him a snack pouch. It gave me enough distraction time to get started and build his trust. He played, sucked on the pouch, and barely noticed I was working around his ears.
Trick: If your child is fussy, let them hold a soft toy or play with a comb to mimic what you’re doing.
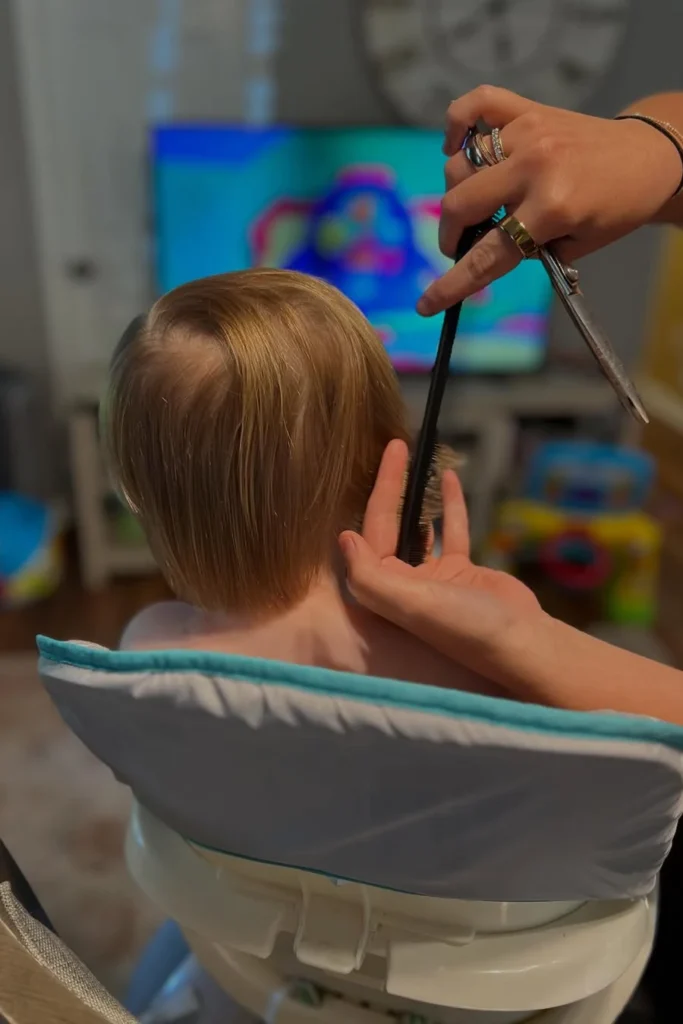
Step 3: Start from the Back
I began by combing and lightly misting the back of his hair. Then I gently trimmed in horizontal sections, using the comb as a guide. I pulled small portions between my fingers, trimmed the ends, and worked from the bottom up.
Pro tip: Cut small amounts at a time. You can always take more off but you can’t put it back.
Step 4: Move to the Sides
Once the back was done, I shifted to the sides. I used the comb to lift small sections in front of his ears and around the temples. Holding the scissors at a slight angle, I snipped to blend into the back.
Trick: Talk to your toddler during this part. I kept saying things like “Wow, you’re doing so great!” and “Almost done!” and it helped.
Step 5: Top and Bangs (The Tricky Part)
The top and bangs required the most patience. I gently combed the front forward, then cut little by little, ensuring not to go too short. I tried to keep the cut natural by using a point-cutting method snipping upward rather than straight across. The result was soft, not too blunt.
Note: Keep the bangs slightly longer than you think you need they spring up when dry.
Step 6: Final Check and Blending
After trimming the main sections, I checked for uneven patches. With my comb, I lifted sections across different angles and made tiny snips where needed to blend layers.
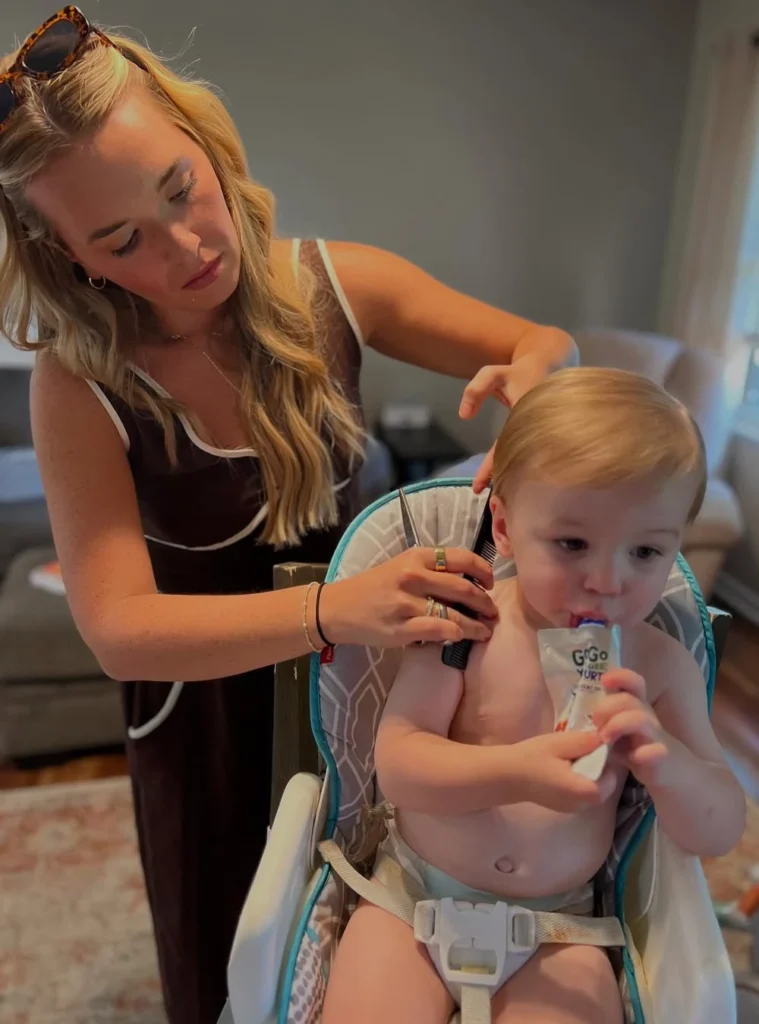
Then I gave him a little mirror moment, clapped, and said, “You look so handsome!”—which made him smile.
Tips and Tricks
- Use a distraction zone: TV shows, snacks, or a favorite toy help the most.
- Don’t rush: Go slow and keep calm. Your toddler will mirror your energy.
- Keep your expectations flexible: It doesn’t have to be perfect just clean and neat.
- Clean up with a gentle brush or towel: Hair gets everywhere, so use a soft brush afterward.
- Praise often: Make your toddler feel proud of the process, not just the result.
What I’d Do Differently Next Time
- Use clips to section better – It got tricky managing the top and back simultaneously.
- Have a second adult nearby – Just to help distract or soothe if needed.
- More frequent mini-trims – It’s easier than waiting for a big haircut session.
Final Thoughts
Cutting your toddler boy’s hair at home might seem daunting, but it’s absolutely doable especially if you keep it simple and set a calm environment. The best part? I saved a trip to the salon and got to enjoy a sweet bonding moment with my little guy.
It wasn’t perfect, but it was definitely good enough. And seeing his freshly trimmed hair, clean neckline, and proud smile was 100% worth it.
So if you’re thinking about trying it just go for it. Trust your hands, be patient, and keep the scissors moving slow. You’ve got this.
Resource: Image by Instagram – @brysanmabe